6 Essential Tips for Troubleshooting Motorcycle Lighting Issues: Motorcycle lighting is a crucial aspect of rider safety, as it not only helps the rider see the road but also makes the motorcyclist visible to other vehicles. Faulty lighting can lead to accidents and increase the risk of injuries. Therefore, it’s essential to address any lighting issues promptly and understand how to troubleshoot them effectively. This guide will walk you through the basics of motorcycle lighting systems, common causes of lighting issues, and how to troubleshoot these problems.
Contents
How Motorcycle Lighting Works
Before you begin troubleshooting your bike’s lighting, it’s important to understand how the lighting system operates. Though different models and makes have unique designs, the basic electrical components remain consistent:
- Power Source: The motorcycle’s battery powers the entire electrical system, including the lights.
- Electrical Load: The bulb is the load that draws power from the battery.
- Grounding and Wires: A proper ground and intact wiring system are essential for the smooth functioning of the lighting.
When any one of these components fails, the lighting system can malfunction. Therefore, when troubleshooting lighting issues, you’ll need to inspect these critical areas.
Common Causes of Lighting Problems
There are several reasons why your motorcycle’s lights may stop working. Below are the most common causes that could be affecting your bike’s lighting system.
1. Bad Grounding
Grounding is essential for the proper flow of electricity through the system. A poor ground connection can cause your lights to flicker, dim, or fail to work altogether. Several factors, such as rust or loose connections, can disrupt the grounding system. Identifying and fixing grounding issues often resolves lighting problems.
2. Short Circuits and Damaged Connections
Short circuits happen when the wiring has been damaged, resulting in an electrical overload. A short can burn the wires, causing damage to your lighting system. Often, the issue is localized to a specific section of the wiring, so pinpointing and replacing the damaged part is usually the solution.
3. Overdrawn Power
If you have added aftermarket accessories or modifications to your motorcycle, it’s possible that the lighting system is drawing more power than the battery can supply. Overloading the system can cause dim lighting or complete failure. It’s important to ensure that the added accessories do not draw excessive power, which can strain the battery and other electrical components.
4. Fuse Issues
Fuses protect the electrical system from overloads and short circuits. If a fuse blows, the circuit may be broken, causing your lights to stop working. It’s a good idea to keep spare fuses on hand so you can replace them if necessary. Check for blown fuses regularly, especially if your lights stop working suddenly.
5. Bad Relay
The relay in a motorcycle converts the power from the battery into the voltage required to power the lights. A faulty relay can prevent the electrical system from receiving the necessary voltage, which can cause lights to malfunction. While relay problems are often difficult to spot visually, a multimeter can help you test the connections to determine if the relay is faulty.
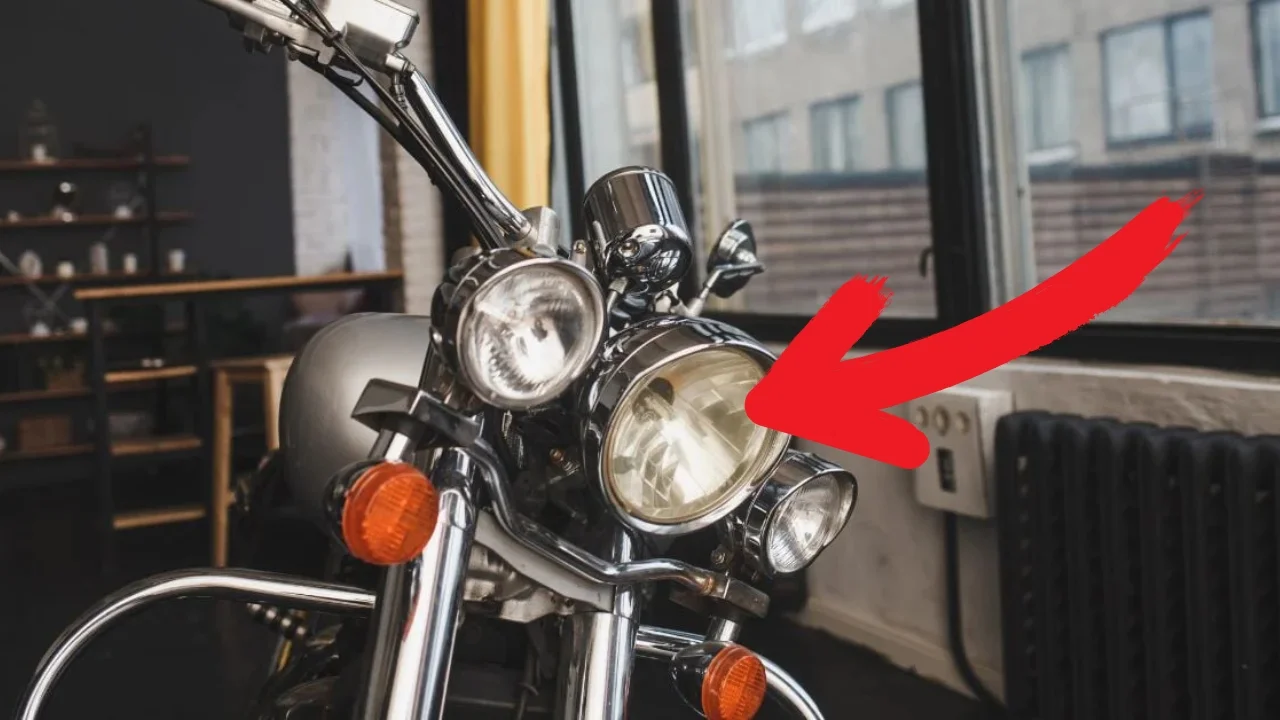
6. Burned-Out Bulb
Sometimes the issue is as simple as a burned-out bulb. Bulbs, especially halogen types, don’t last forever and will eventually stop working. Regular maintenance includes checking and replacing bulbs before they burn out completely. While LED lights tend to last much longer, they too will eventually require replacement.
How to Troubleshoot Motorcycle Lighting Problems
Troubleshooting your motorcycle’s lighting system can seem daunting, but with the right tools and approach, you can diagnose and fix the problem. Follow these steps to effectively troubleshoot your lighting issues.
Step 1: Get the Right Tools
Before you begin troubleshooting, make sure you have the necessary tools. Working with electrical systems can be hazardous, so it’s important to use the proper equipment for safety and accuracy. Two essential tools for testing electrical systems are:
- Test Light: This will help you determine whether there is an electrical current running through the system.
- Voltmeter: A voltmeter is used to measure the voltage levels in the system to ensure the electrical components are getting the correct amount of power.
These tools will help you diagnose most lighting problems on your motorcycle.
Step 2: Test the Basics
Start by testing the most basic components. Check the battery to ensure it has power, and inspect the bulb to see if it has burned out. These are the simplest steps to eliminate obvious issues. A dead battery or a burned-out bulb is a quick fix and may solve the problem immediately.
Step 3: Diagnose Likely Causes First
It’s important to approach troubleshooting logically. Start by testing the components that are most likely to be causing the problem. For example, check for a blown fuse or a damaged bulb before moving on to more complex issues like grounding or short circuits. This will save you time and effort.
Step 4: Focus on Specific Areas
Once you’ve identified a possible issue, focus on the area that seems to be the problem. For instance, if you suspect a short circuit, inspect the wiring for damage. If you think the ground connection is faulty, examine the grounding points for loose connections or corrosion. Be methodical in your approach to avoid wasting time on unnecessary steps.
Step 5: Consult the Owner’s Manual
The owner’s manual is a valuable resource when troubleshooting electrical issues. It will provide detailed information on your bike’s electrical system, including wiring diagrams and troubleshooting tips. Always refer to the manual when working on your motorcycle’s electrical components.
Step 6: Understand What You’re Testing
Finally, it’s crucial to know what you’re testing and why. Understanding the function of each component and how it works will allow you to interpret your test results accurately. Troubleshooting is all about making logical deductions based on evidence, so ensure you understand the process thoroughly.
FAQs on Motorcycle Lighting Troubleshooting
Q1: My motorcycle’s headlight is dim. What could be the problem?
- A dim headlight can be caused by a few things: a weak battery, bad grounding, or an overloaded electrical system. Start by testing the battery and checking the bulb. If those are fine, inspect the wiring and grounding connections for issues.
Q2: How often should I replace my motorcycle bulbs?
- It’s recommended to replace motorcycle bulbs every couple of years, or sooner if you notice dimming or flickering. LED bulbs last longer, but they should still be replaced when they fail.
Q3: Can adding accessories to my bike cause lighting issues?
- Yes, adding accessories that draw excessive power can overtax your electrical system and cause lighting issues. Always make sure the electrical system can handle the extra load before adding accessories.
Q4: How can I tell if my motorcycle fuse is blown?
- A blown fuse will typically cause a specific electrical component (like the lights) to stop working. Check the fuses in the electrical system and replace any that are damaged or blown.
Q5: Can I troubleshoot motorcycle lighting issues myself?
- Yes, with the right tools and a basic understanding of electrical systems, most lighting issues can be diagnosed and fixed by the rider. However, if you’re unsure or uncomfortable working with electrical systems, it’s best to seek help from a professional mechanic.
Conclusion
Motorcycle lighting is an essential component of your bike’s safety system, and understanding how to troubleshoot lighting problems can help ensure that you stay visible and safe on the road. By following a methodical approach, using the proper tools, and focusing on likely issues first, you can resolve most lighting problems on your own. However, if you’re not comfortable dealing with electrical systems, don’t hesitate to seek professional help.